TitanPro Cutting
Choosing an engraving bit for acrylic is not a small detail. The wrong geometry can leave cloudy edges, melt marks, or tiny chips around a letter. The right bit helps produce crisp lines and cleaner pockets, but material thickness, machine rigidity, and feed settings matter too. This guide explores how to select the right bits for acrylic engraving, with practical checks you can apply before the first pass.
A useful shop-floor principle is: “Let the cutter clear the chip; do not force the acrylic to behave.” That is an editorial rule of thumb, not a quotation attributed to a named expert. Without a verifiable source, attaching a quote to a specialist would risk misleading readers. The tips instead focus on observable factors: single- or double-flute design, sharp cutting edges, bit diameter, flute length, and the finish left on a test piece. A 1/8-inch cutter may suit fine lettering, while a wider tool can clear larger areas more efficiently. Small differences matter.
Even a suitable bit can perform poorly with excessive heat or chip buildup. Test settings on scrap from the same acrylic sheet. Inspect the edge under good light. A little trial and error is normal. The aim is not simply to buy the most expensive cutter, but to match its shape and cutting action to the job, machine, and material.
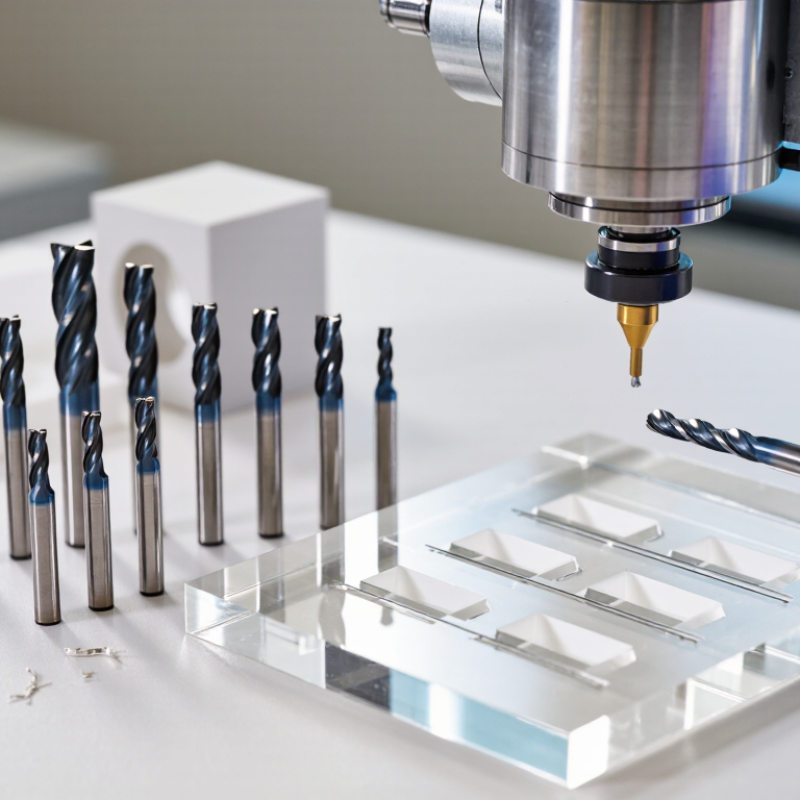
Acrylic is not one uniform surface. Cast and extruded sheets can produce different engraving results, even at the same thickness. Cast acrylic often leaves a frosted, light-colored mark, which makes lettering easier to read. Extruded acrylic may retain a clearer appearance, but small marks can have less contrast. Check the sheet offcut if its type is uncertain. A quick test matters.
Match the bit to the detail and the material. A sharp, single-flute bit can clear chips effectively, while a fine V-bit suits narrow lines and small text. For broad, flat areas, a flat-ended bit may give more even coverage. Keep the cutter clean and avoid forcing deep cuts in one pass; excess heat can soften acrylic and leave melted edges. Secure the sheet firmly, since vibration can chip corners or distort fine lettering. Test the intended depth and feed rate on scrap from the same sheet. The first result may disappoint. That is useful evidence, not a perfect answer: adjust one setting at a time, and inspect the edge under good light before engraving the final piece.
Common nominal acrylic sheet thicknesses (mm)
Sheet thickness is one factor when choosing an engraving bit: check the bit’s cutting length and set engraving depth for the job. These are common nominal sizes, not an exhaustive list; measure the actual sheet and test your settings on a scrap piece. Sharp bits, light passes, and good chip removal help reduce heat buildup and edge melting.
Top 10 Tips to Choose the Right Acrylic Engraving Bits?
Compare Bit Materials, Coatings, and Cutting Geometry
For acrylic, bit material matters, but edge sharpness matters more. Solid carbide holds a keen edge and resists wear during repeat jobs. High-speed steel can work for occasional engraving, though it dulls sooner. Avoid assuming a harder bit always cuts cleaner. A chipped edge can leave white, ragged lines. Check the flute under bright light.
Coatings need careful judgment. Some hard coatings reduce friction in metal cutting, but added thickness can blunt a tiny engraving edge. For acrylic, a polished, uncoated cutting surface often helps chips slide away instead of sticking. ASTM D696-based engineering data place PMMA’s thermal expansion near 70 micrometres per metre per degree Celsius, with grade-dependent variation. That movement makes heat control practical, not theoretical: watch for softened edges and melted chips. Keep chips clear. I still check twice.
Geometry shapes the finish. A single-flute bit offers generous chip space, useful when acrylic chips tend to pack into narrow grooves. A sharp, low-helix or straight flute can reduce pulling on thin sheets; test on scrap, since the best angle depends on thickness and machine rigidity. Industry machining guidance, including the ASM Handbook’s machining coverage, emphasizes matching tool geometry and cutting conditions to the work material. Start with a shallow pass and inspect the groove under side lighting. A slightly slower feed may look safer, but it can build heat if the bit rubs rather than cuts. Test, then adjust.
Acrylic can chip, melt, or show cloudy edges when a bit is poorly matched. Choose diameter based on the smallest detail in your design. A narrow bit handles fine lettering, but it is easier to break. Larger bits cut broad pockets more steadily. Keep the toolpath and machine rigidity in mind, too.
Tips: Compare flute count with chip removal needs. A sharp single-flute bit often clears chips well in acrylic. A two-flute bit may leave a smoother finish, but crowded chips can build heat. If the cut starts looking glossy or sticky, pause and check chip evacuation, feed, and bit condition. The right setting depends on your setup.
Tip: Match the tip shape to the job. A V-shaped tip suits narrow lines and lettering; a flat end cuts pockets with an even floor. Ball tips can create rounded details, though they may not suit crisp corners. Test on a secured scrap piece first. Inspect the edge under good light. I still find charts less decisive than a small test cut. A slightly imperfect sample can reveal a problem before it reaches the finished panel.
Match the bit to the machine before matching it to the design. Check the collet size, shank diameter, maximum spindle speed, and available clearance. A bit that fits the collet can still vibrate if the shank is too long or the setup is loose. For fine lettering, a short, sharp single-flute bit often clears chips well. Choose a V-bit for crisp lines, but check its included angle against the letter size. Tiny text can vanish under a wide cut.
Acrylic also needs a cool, clean cut. MatWeb’s PMMA property records list typical density near 1.18 g/cm³ and thermal conductivity around 0.19 W/m·K; grades vary. Since heat escapes slowly, rubbing can soften the cut edge or weld chips into the groove. Use a sharp edge, suitable chip clearance, and firm sheet support. Match feed and speed to the machine, not just the bit label. I still find this easy to misjudge.
Test on offcuts from the same sheet. Listen for chatter, then inspect the groove for melted edges and clear, manageable chips. If the engraving looks cloudy, reduce rubbing by adjusting feed, speed, or depth in small steps. Clamp thin acrylic close to the cutting area, while keeping clamps clear of the toolpath. A brief test may feel tedious. It can save the finished panel.
| Tip | What to Check | Suitable Bit or Setup | Why It Matters | Practical Check |
|---|---|---|---|---|
| 1 | Confirm the engraver type | Choose a bit designed for the machine’s motion and spindle or rotary tool. | CNC routers, rotary engravers, and hand tools use different holders, speeds, and cutting approaches. | Check the machine manual for supported bit types, maximum speed, and tool-holding method. |
| 2 | Match the shank to the collet | Select a shank diameter that exactly matches the installed collet. | A correctly sized, clean collet helps hold the bit securely and reduces runout and vibration. | Measure or verify the collet size; do not force a bit into an incompatible collet. |
| 3 | Choose a sharp cutting geometry | For many CNC acrylic jobs, consider a polished, single-flute cutting bit intended for plastics. | A sharp edge and space for chips can help limit heat buildup and reduce melting or chip welding. | Inspect the edge for chips, wear, or residue, and replace a dull bit rather than increasing pressure. |
| 4 | Match the tip to the engraving detail | Use a fine pointed or small-diameter bit for narrow lines; use a wider tool for broader grooves. | The tip shape and diameter affect line width, corner detail, and the minimum feature the design can reproduce. | Compare the bit’s cutting diameter with the narrowest line and smallest gap in the artwork. |
| 5 | Identify the acrylic type | Test the selected bit and cutting settings on the same type of acrylic as the final workpiece. | Cast and extruded acrylic can machine differently, so a setting that works well for one may not suit the other. | Use a scrap piece of the same material and thickness before engraving the finished part. |
| 6 | Balance speed and feed | Follow the machine and bit maker’s guidance, then adjust spindle speed and feed rate through test cuts. | Excessive heat can soften acrylic, while an unsuitable feed can cause poor edges, chatter, or tool stress. | Look for clean chips and a smooth cut; stop and reassess if the acrylic melts, smears, or vibrates. |
| 7 | Set a suitable engraving depth | Use shallow passes for fine surface engraving; use multiple passes when deeper cuts are required. | Reducing the load on each pass can improve control and help avoid excessive heat or breakage. | Run a small test and increase depth gradually rather than taking an unnecessarily deep first pass. |
| 8 | Plan for chip removal | Use effective dust extraction or directed air where appropriate and safe for the machine and material. | Clearing chips helps prevent them from recutting or collecting around the bit, where friction can add heat. | Keep the cutting area visible and stop the machine before clearing chips by hand. |
| 9 | Secure and support the workpiece | Clamp or fixture the acrylic evenly, with support close to the cutting area. | Movement or vibration can spoil fine details, create rough edges, or cause the bit to catch. | Check that the sheet cannot shift or flex, and keep clamps clear of the toolpath. |
| 10 | Run a test before the final job | Verify the bit, toolpath, depth, and machine settings on a representative offcut. | A short test can reveal fit, finish, and clearance issues before they affect the finished workpiece. | Inspect the test for line quality, melting, burrs, and dimensional accuracy; adjust one setting at a time. |
Acrylic engraving is a heat-management task as much as a cutting task. Too much spindle speed can soften the material, while a slow feed may let the bit rub instead of cut. Watch the chips. Clean, distinct chips usually indicate that the cutter is clearing material; melted edges or a plastic smear suggest excess heat. Adjust spindle speed and feed rate together, in small steps, rather than changing both dramatically. The right settings depend on bit diameter, flute design, acrylic type, and machine rigidity, so a universal number can mislead.
Use a scrap piece from the same sheet to test your setup. Test on scrap.
Begin with a shallow cutting depth, around 0.2 to 0.5 mm for a fine engraving, then inspect the groove before making deeper passes. Follow the cutter maker’s limits if available. A deep cut can load a small bit, chatter, or leave a rough edge; several light passes are often more predictable. Secure the sheet firmly, and check that chips can escape the cut. I have found that clear acrylic can look clean at first, then reveal tiny chips under angled light. That detail is easy to miss, and it is a good reason to inspect the surface before running a full panel.
No. Cast acrylic often leaves a frosted, light-colored mark. Extruded acrylic may look clearer, but fine marks can have less contrast.
Test a small offcut from the same sheet. A quick sample can reveal the finish. Check it under good light.
A sharp, narrow bit can handle small text. A V-bit suits crisp lines, but tiny lettering may disappear under a wide cut.
A flat-ended bit can create an even pocket floor. Larger diameters are often steadier, but they cannot capture fine details.
A single-flute bit often clears chips well. A two-flute bit may leave a smoother finish, though crowded chips can build heat.
Glossy or sticky edges, melted grooves, and chips stuck in the cut can signal excess heat. Pause and inspect the bit.
Clamp the sheet firmly near the cutting area. Keep clamps outside the toolpath. Thin acrylic can vibrate.
Check collet size, shank diameter, spindle speed, and tool clearance. A bit can fit yet still vibrate if its shank is too long.
Test on a secured offcut. Change one setting at a time and inspect the edge. The first result may disappoint. That is useful evidence.
Choosing the right acrylic engraving bit starts with understanding the material and the result you want. Different acrylic types can respond differently to cutting, so consider whether the job calls for fine lettering, detailed designs, or deeper grooves. Compare bit materials, coatings, and cutting geometry, then select a diameter, flute count, and tip shape suited to the required detail and finish. These choices can help reduce chipping, melting, and rough edges.
For consistent results, match the bit to your engraver’s collet and the workpiece’s size and stability. Secure the acrylic firmly, and use measured test cuts to find an effective speed, feed rate, and cutting depth. Rather than relying on one setting for every project, adjust gradually and inspect the cut as you go. This practical approach to how to select the right bits for acrylic engraving can improve precision, protect the material, and produce cleaner, more reliable results.